How to Run Your First Vulnerability Scan with CVEasy AI
In about thirty minutes you go from a cold install to knowing your real exposure. Here is the exact path, start to finish, running entirely on your own Mac.

Most vulnerability tools make you earn the answer. You stand up infrastructure, wire credentials into a cloud you do not control, wait on a scan queue, and somewhere on the far side of all that you finally see a number. CVEasy AI inverts that. You install it on your Mac, point it at data you already have, and inside half an hour you are looking at your real exposure, sorted by what actually matters. No cloud account. No data leaving the machine. This is the honest thirty minutes I give every new user, not the demo-day version.
Set one thing straight up front. The goal of this first scan is not to patch faster. It is to know your exposure first, with enough context that the patching decisions make themselves. Speed is a byproduct of clarity.
Install, launch, and let the wizard check itself
Install CVEasy AI and launch it. The first thing you meet is the setup wizard, and it does something I wish more security tools did: it verifies its own footing before it asks anything of you. The wizard confirms three things are healthy on your machine, the AI Engine, the AI Model, and the local Database. That trio is what lets everything downstream run on device. The engine and model do the reasoning. The local database holds your assets, your findings, and a catalog of CVEs you can work against with no internet connection at all.
When all three read green, you are clear to move. If something is not happy, the wizard names the piece and the reason, so you are never guessing. Everything you do from here lives on your hardware.
Activate your license
Next you activate. Your license key looks like CVEAI-PRO-..., and you paste it into the activation screen. That is the whole step. Activation unlocks the full workflow, the scoring engine, BASzy, and the catalog, and it does it without phoning home for anything it needs to operate. Once the key takes, you land in the app proper.
Set your organization profile before you do anything else
Resist the urge to import a scan the second you are in. Go to Settings first and fill in your organization profile. This is not paperwork. Your industry and your compliance context feed directly into how CVEasy scores risk. A finding on a payment system in a regulated environment does not carry the same weight as the same finding on a lab box, and the only way the tool can tell the difference is if you tell it who you are. Two minutes here changes every priority number you see later. Skip it and your scores are generic. Fill it in and they are yours.
Bring data in: import a scan, or discover with BASzy
Now the actual scan. CVEasy gives you two front doors, and you can use either or both.
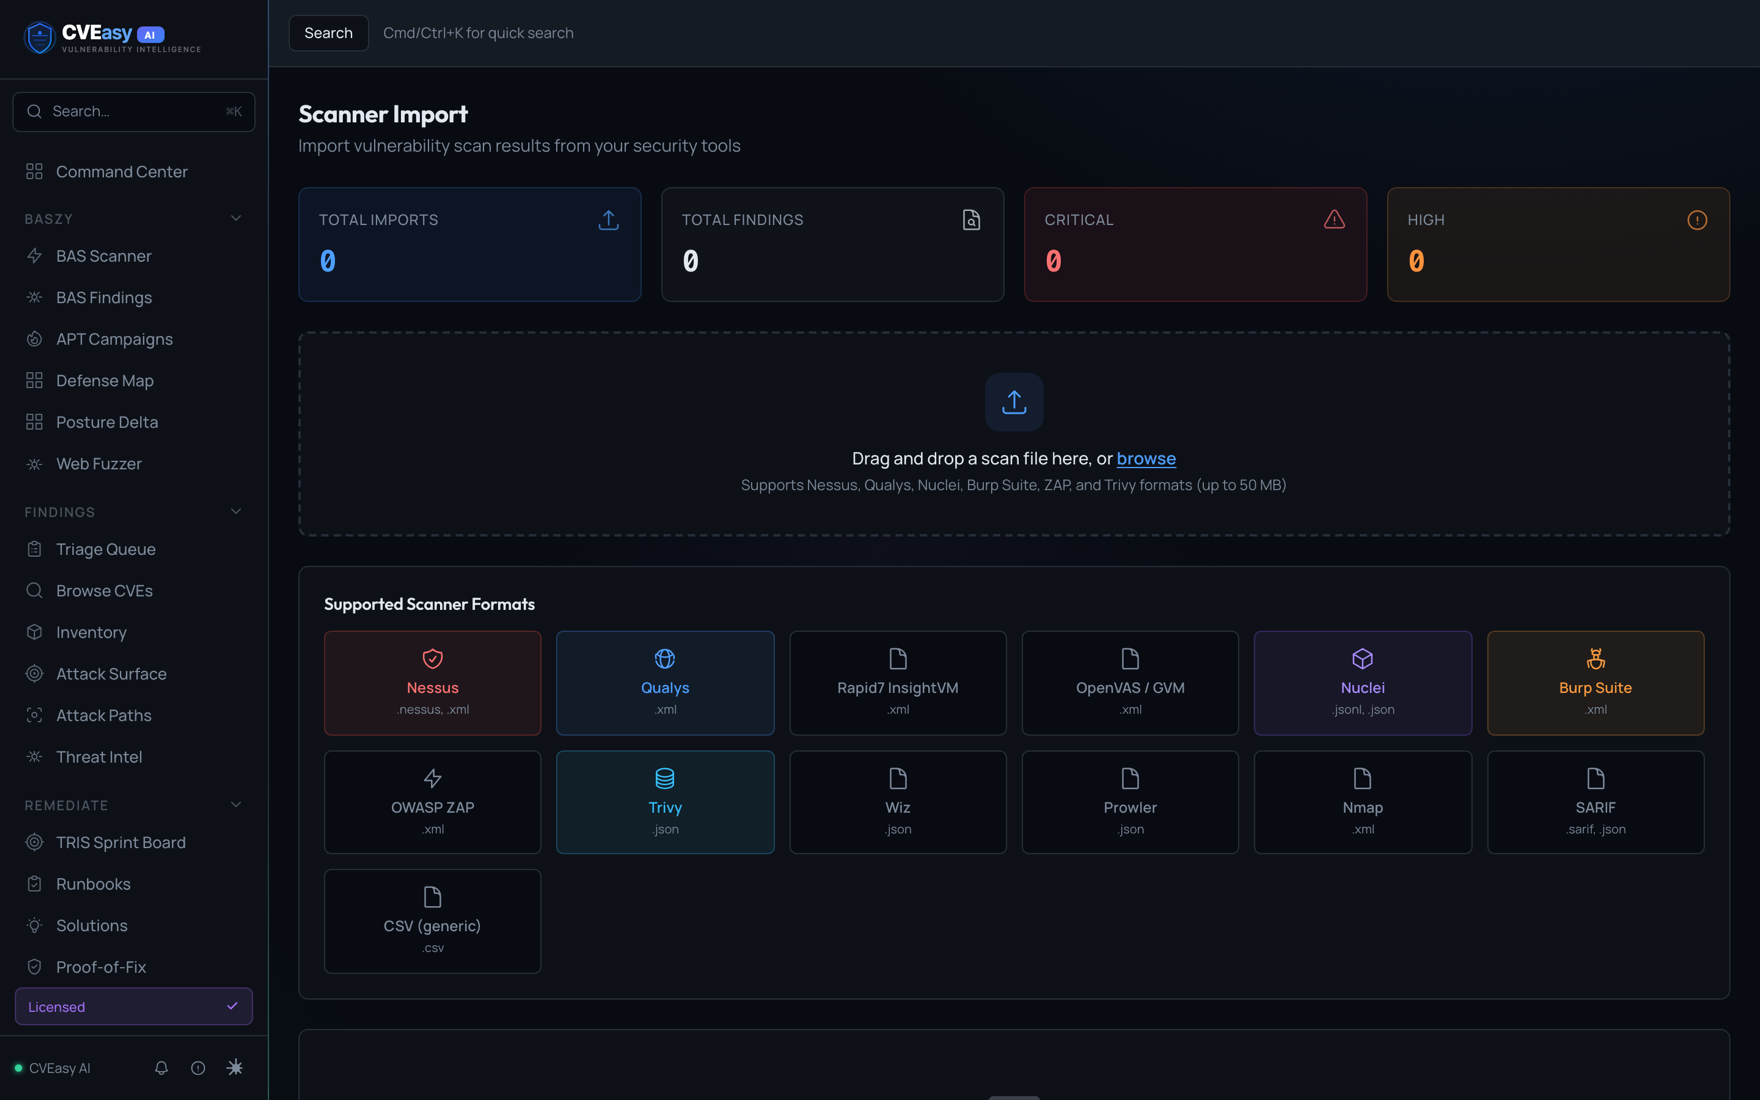
The fast path is to import an existing scan. Open Scan Imports under the Integrate group, then drag and drop your file onto the page. CVEasy auto-detects 13 scanner formats, so you do not need to tell it what you are handing it. It recognizes Nessus, Qualys, Rapid7 InsightVM, OpenVAS, Nuclei, Burp Suite, OWASP ZAP, Trivy, Wiz, Prowler, Nmap, SARIF, and plain CSV. If you already run a scanner, you already have the input. Export, drag, done.
The discovery path is BASzy, the built-in BAS Scanner. If you have no scan to import, or you want CVEasy to find what is actually live on your network, open BASzy and enter an authorized range, something like 10.0.0.0/24. Only point it at ranges you are authorized to scan. BASzy discovers the assets itself, so you reach a real picture even on a network nobody has inventoried in years.
Whichever door you use, the same thing happens on the other side, and this is where CVEasy earns its keep. On import it creates assets, links CVEs to them with port and CVSS detail, reaches out to NVD to fetch any CVEs your data referenced but did not fully describe, and then computes a TRIS score for every CVE on every asset. Then it updates your dashboards. You did not build a single spreadsheet. The raw findings walked in as a file and walked out as a scored, contextual map of your environment.
Read the Command Center
Head to the Command Center. This is your situational awareness in one view. Up top is the KPI deck, the high-level read on your posture. Below it is the part you will live in: the Priority Queue, sorted by TRIS. TRIS is the score that answers the question CVSS never could, which is not "how bad is this vulnerability in the abstract," but "how much does this specific finding, on this specific asset, in my specific organization, actually expose me." The queue puts the things that matter to you at the top. You are not scrolling a wall of criticals that are mostly noise. You are reading a ranked list of your real problems.
Open a finding and see why it ranked
Click into something. From Browse CVEs you can search the local catalog, more than 337,000 CVEs sitting on your disk, no connection required. Open any one and the CVE detail page lays out the full case for its rank: its EPSS exploitation probability, whether it sits on the CISA KEV list of known exploited vulnerabilities, the attacker pressure it is under, its compliance impact against the context you set in Settings, and a TRIS ring that turns all of that into one number you can act on. This is the difference between a tool that hands you a finding and a tool that hands you a decision. You are not being asked to go research whether this thing is being exploited in the wild. CVEasy already pulled that together and showed its work.
Work the Triage Queue
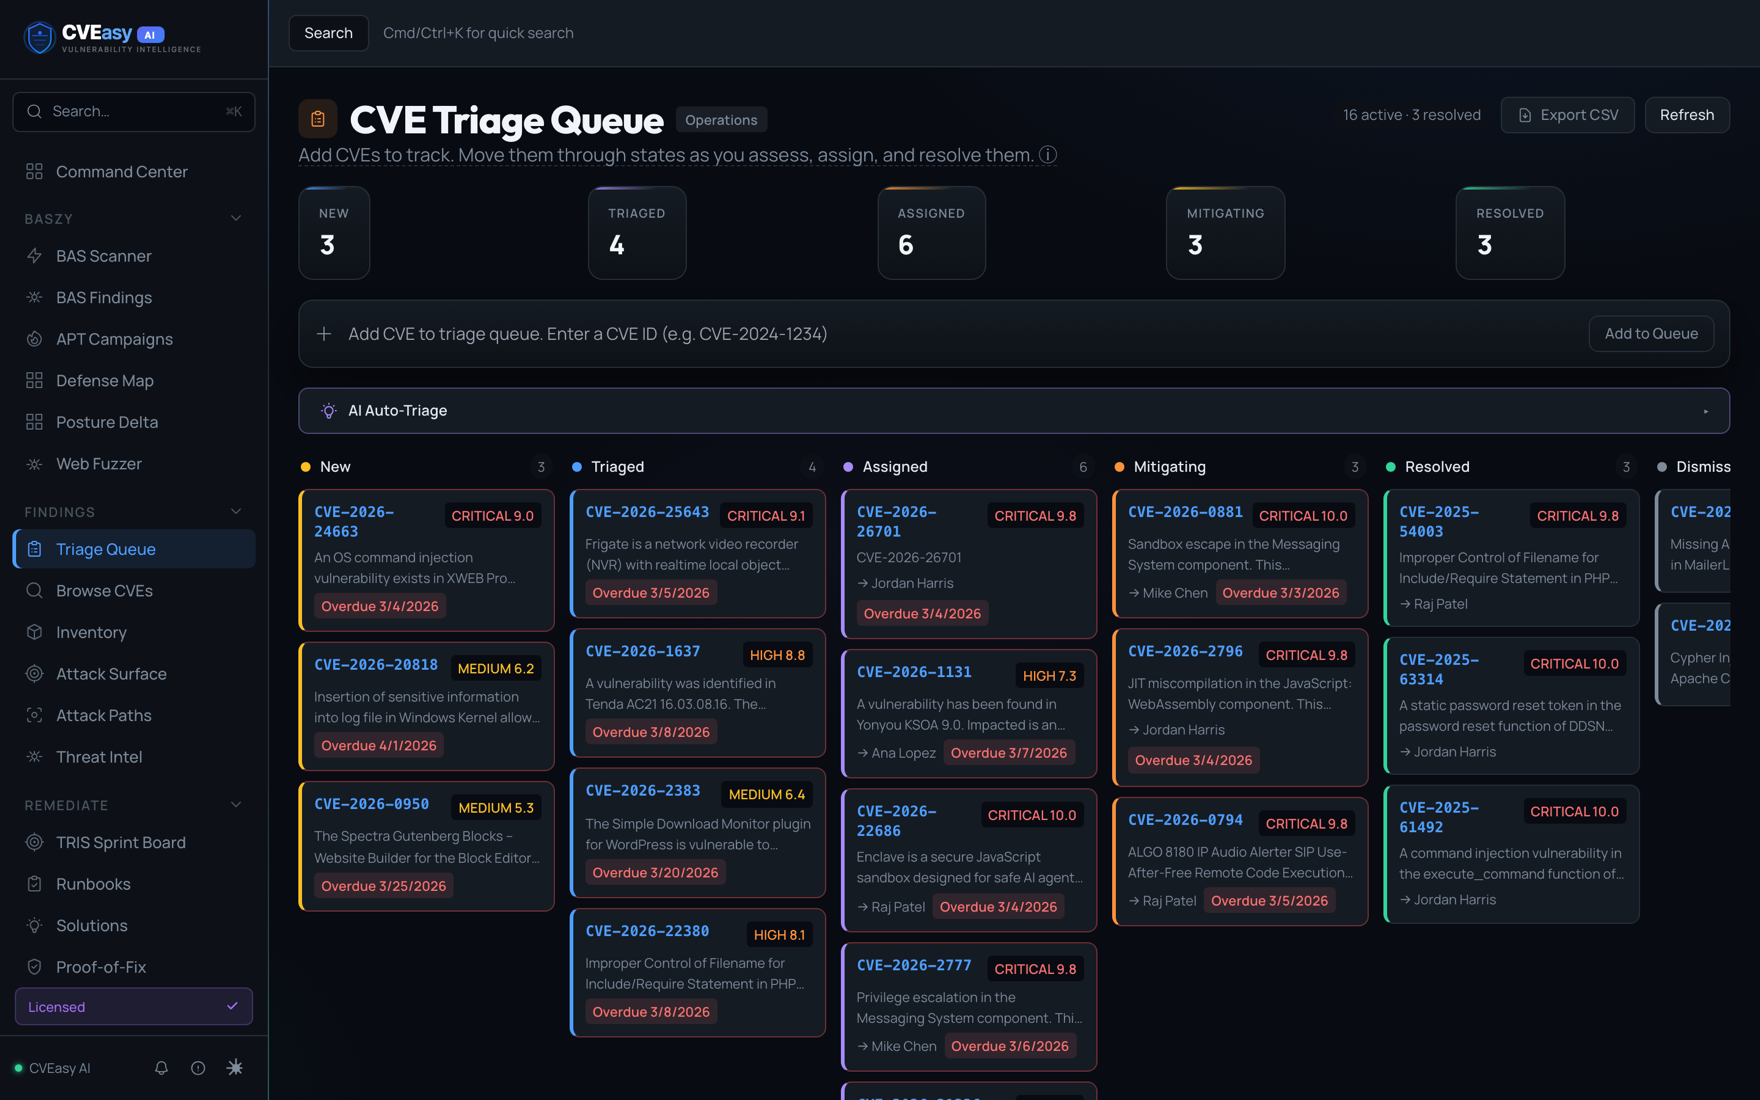
Knowing is half of it. Moving is the other half, and the Triage Queue is where work actually happens. It is a kanban board with five columns, New, Triaged, Assigned, Mitigating, and Resolved. Every finding has a lane, and you drag it across the board as it moves through your process. New findings land in New. You triage them, assign an owner, push them into Mitigating as work starts, and drop them into Resolved when the fix is verified. It gives a team, or a team of one, a shared picture of what is in flight and what is done, without a separate ticketing tool bolted on the side.
Prioritize on the TRIS Sprint Board
The last stop on your first pass is the TRIS Sprint Board, where prioritization stops being a feeling and becomes a plan. CVEasy bands your work into four clear actions based on TRIS. ACT means patch within 72 hours, these are the findings that genuinely expose you right now. ATTEND means handle it within 2 weeks. TRACK means this quarter. MONITOR means watch it and keep it on the radar without burning a cycle today. By the time you reach this board, the agonizing question of what to do first has already been answered for you, in plain language, banded by urgency. You work top to bottom and trust that the order reflects your actual risk, not a raw severity score that does not know your business.
What you actually accomplished
Walk back through it. You installed a tool that verified its own engine, model, and database before asking you for anything. You activated with a key and never sent your data anywhere. You told it who you are so its scoring would be yours. You fed it a scan you already had, or let BASzy go find your assets for you, and it turned raw findings into scored, contextual exposure on its own. Then you read the Command Center, opened findings that showed their work, moved real work across the Triage Queue, and prioritized on a board that bands by urgency instead of dumping a pile of criticals in your lap.
All of it ran on your Mac. All of it ran fully offline. Nothing about your environment left the building, which for a lot of teams is the difference between being allowed to use a tool and not.
That is the first scan. The number at the end is not the point. The point is that you now know, with context, what your real exposure is and what to do about it first. That is the position you want to be standing in the day the next zero-day drops, and you got there in about thirty minutes.