Run Your First Scan
From a cold install to a board-ready report, with a screenshot at every step. Plan on about thirty minutes the first time through.
CVEasy AI runs entirely on your Mac. There is no cloud account to provision, no agent to deploy on a server, and no data leaving your hardware. This walkthrough takes a brand new install all the way through the workflow a security team actually runs: get data in, read your risk, triage what matters, prioritize the fixes, prove what is actually exploitable with BASzy, and report it to leadership. Every screenshot below is the real application.
1. Install and launch
Download the DMG from your purchase confirmation, drag CVEasy AI into Applications, and open it. There is no Homebrew, no Python, and no command line. On first launch the app seeds its CVE database, starts the built-in AI engine, and walks you through a short setup wizard.
The wizard verifies the three core components before you do anything else: the AI Engine, the security-tuned AI Model, and the local Database. When all three read Ready, click Continue.
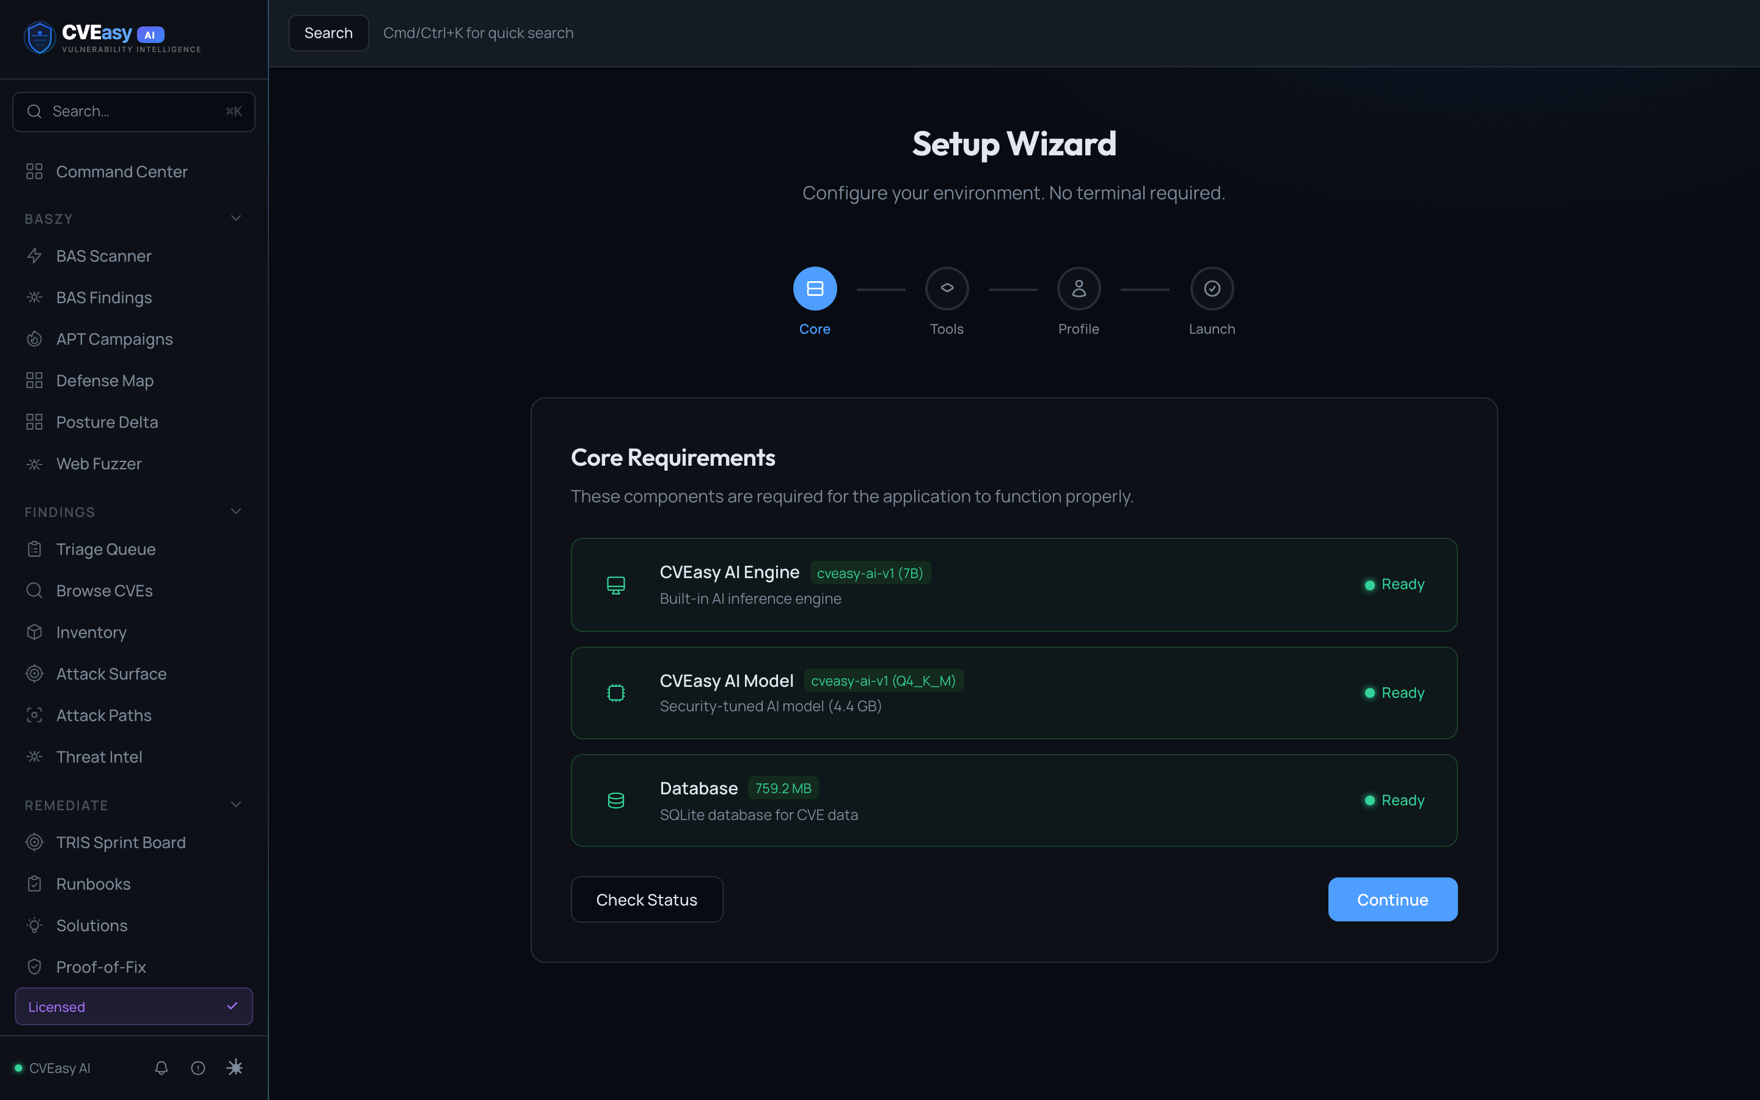
Setup Wizard. Core components verify locally. The wizard then collects optional tools and your organization profile before launching.
2. Activate your license
Open Activate CVEasy AI from the prompt on first run, or later from the Activate link at the bottom of the sidebar. Paste the license key from your confirmation email and click Activate This Machine. Keys look like CVEAI-PRO-.... If you bought it but lost the key, enter the email used at checkout to retrieve it.
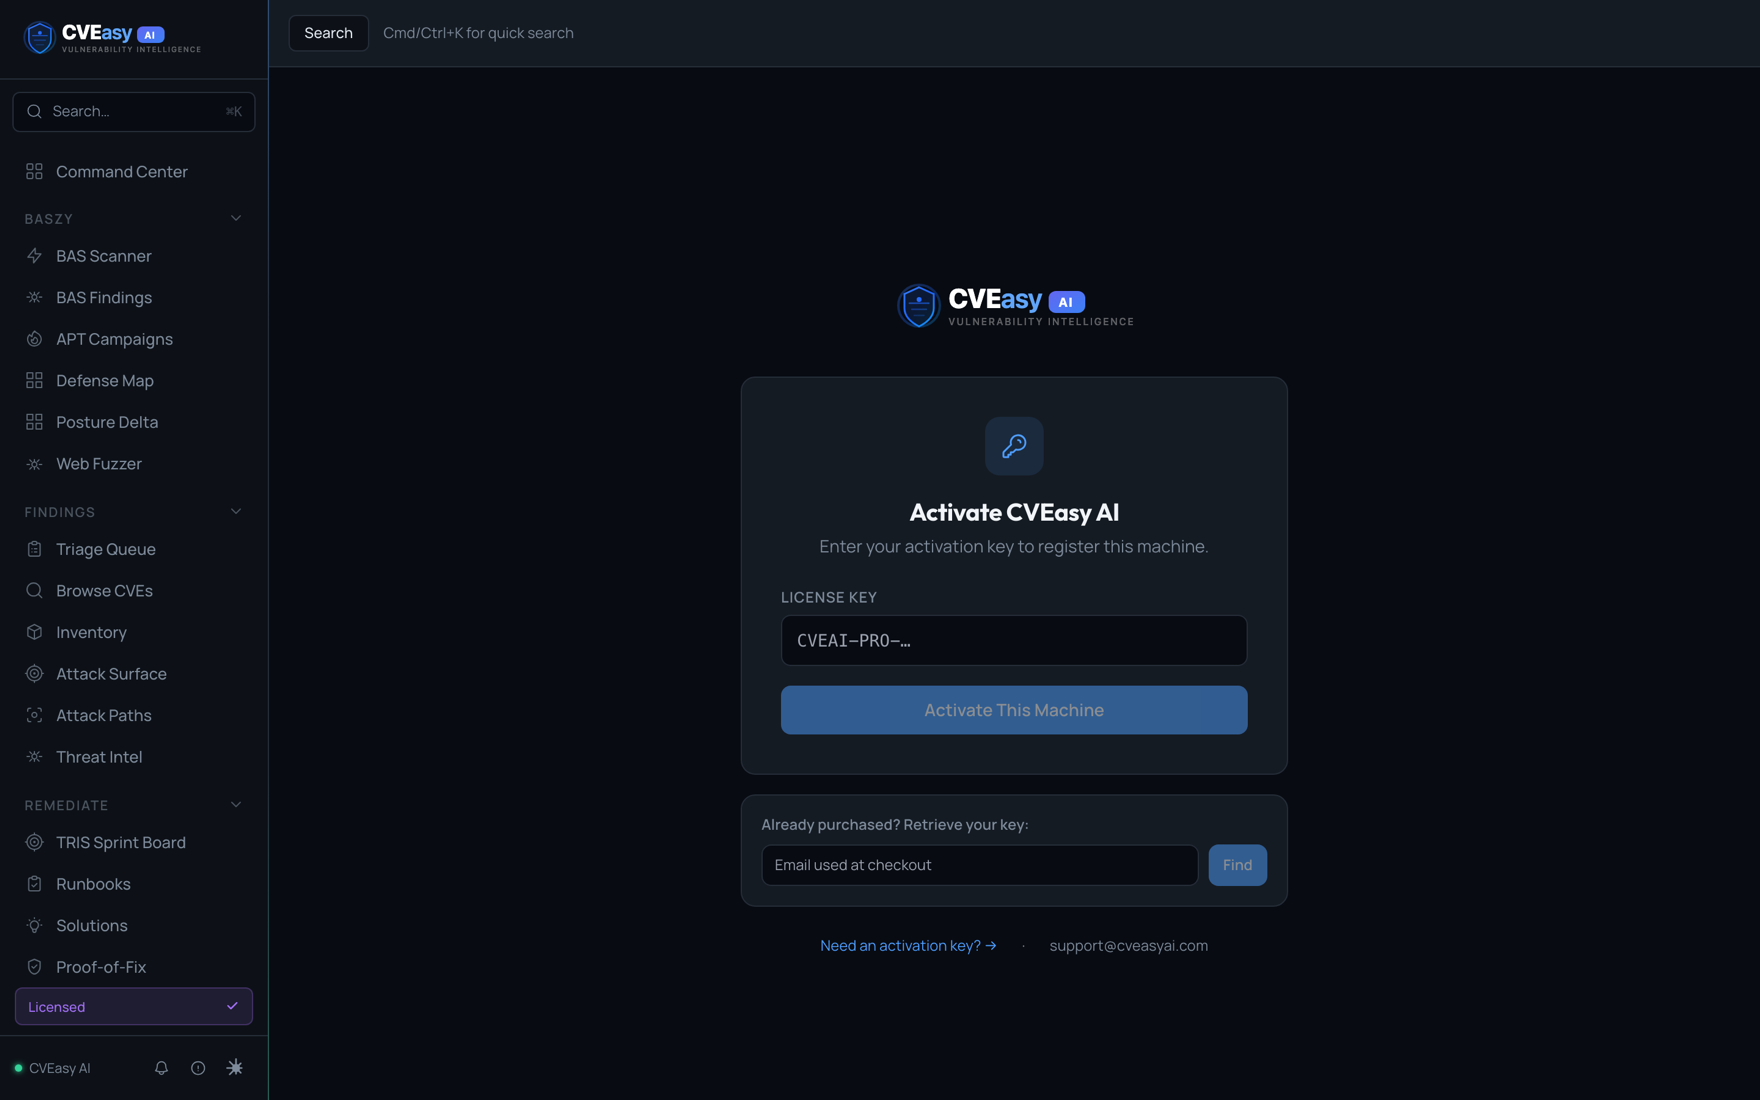
License activation. Activation is per machine and works offline. Lost your key? Retrieve it with your checkout email.
3. Tell CVEasy about your organization
This step is easy to skip and worth doing. Your industry, compliance frameworks, and asset categories feed directly into how risk is scored. A vulnerability on a HIPAA-regulated clinical system should not rank the same as the identical CVE on a lab workstation, and once your profile is set, it does not.
Open Settings under the Manage group in the sidebar. Set your company name, pick your industry, and toggle on the frameworks you answer to (HIPAA, SOC 2, PCI-DSS, and so on). Save.
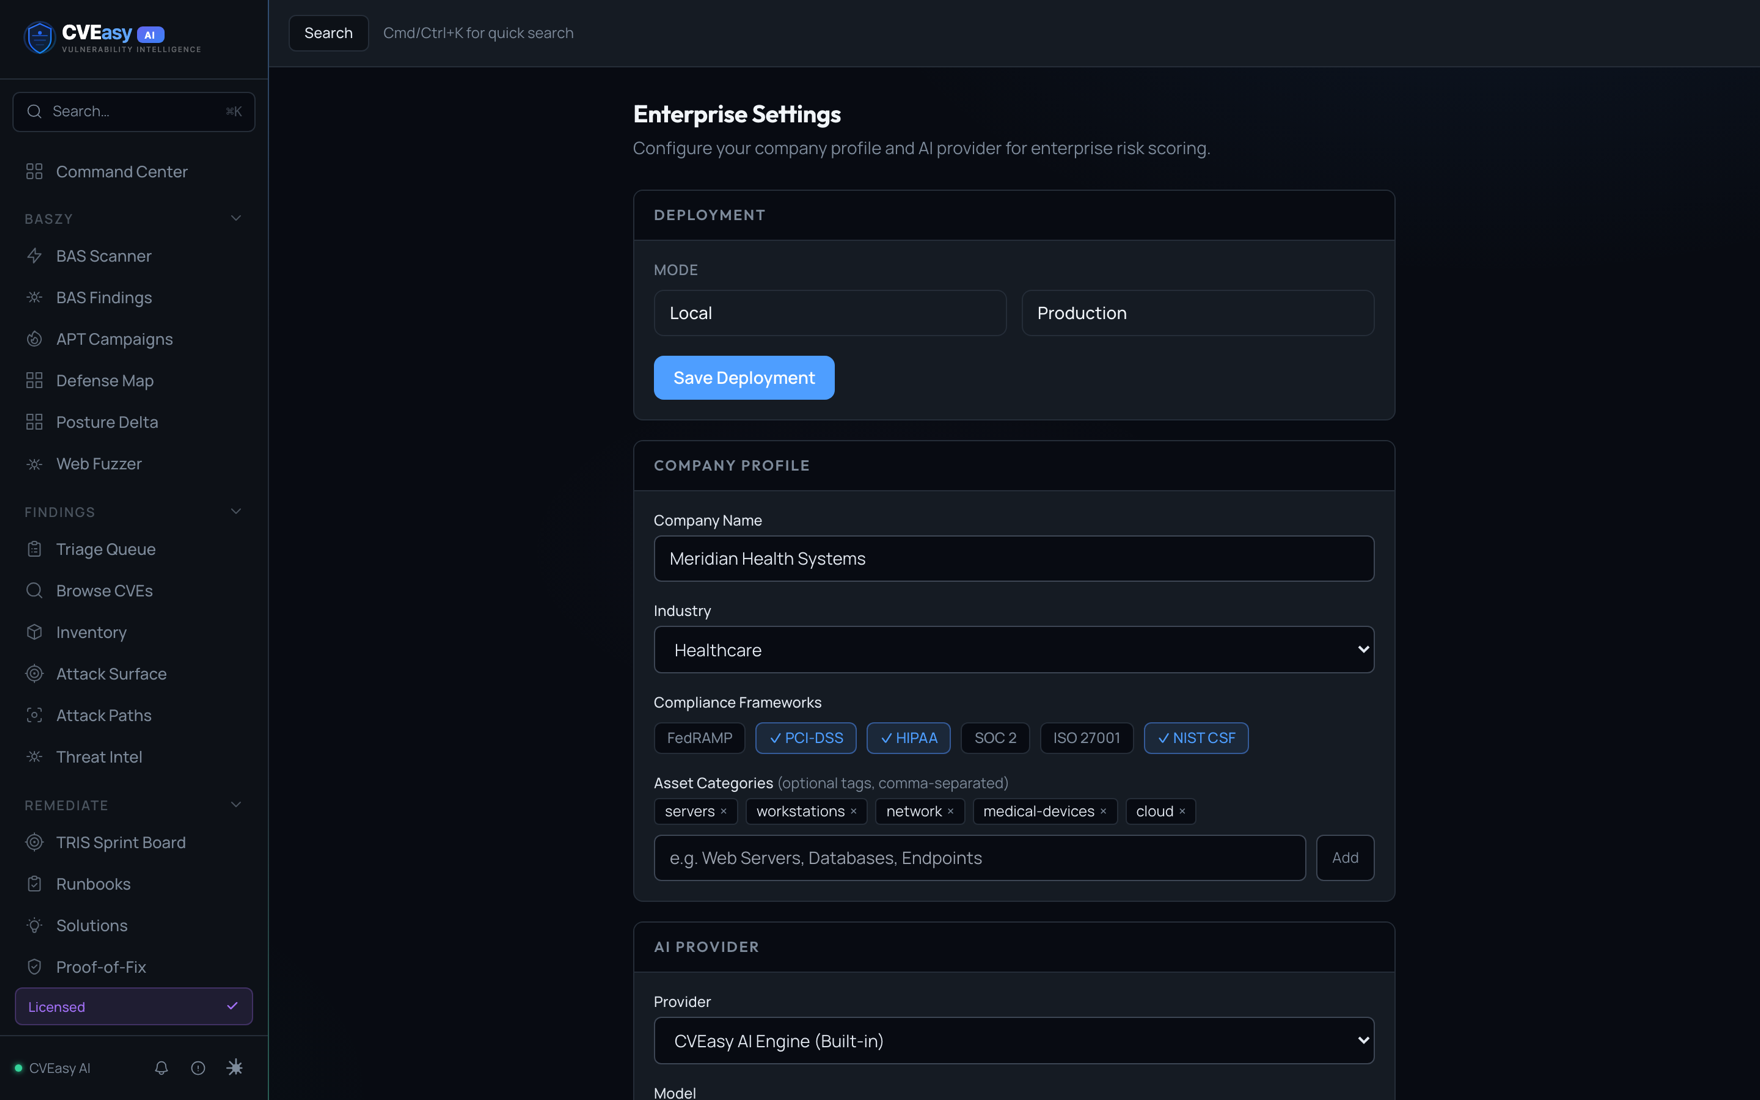
Organization profile. Industry and compliance context flow into TRIS scoring, so prioritization reflects your business, not a generic average.
4. Bring in your first scan
There are three ways to populate CVEasy. Pick whichever matches where you are today.
Path A. Connect a scanner or EDR
If your team runs Rapid7 InsightVM, Tenable.io, Qualys VMDR, CrowdStrike, SentinelOne, or Microsoft Defender, this is the best start. Open Connectors under Integrate, paste your API credentials, click Test, then Pull. Findings arrive with full asset identity, duplicates across tools merge into single exposures, and Schedule keeps everything current automatically, from every 15 minutes to daily.
Path B. Import an existing scan
If your team already runs a scanner, this is the fastest start. Open Scan Imports under the Integrate group, then drag your export onto the drop zone. CVEasy auto-detects the format across 13 supported tools, so you never have to tell it which scanner produced the file.
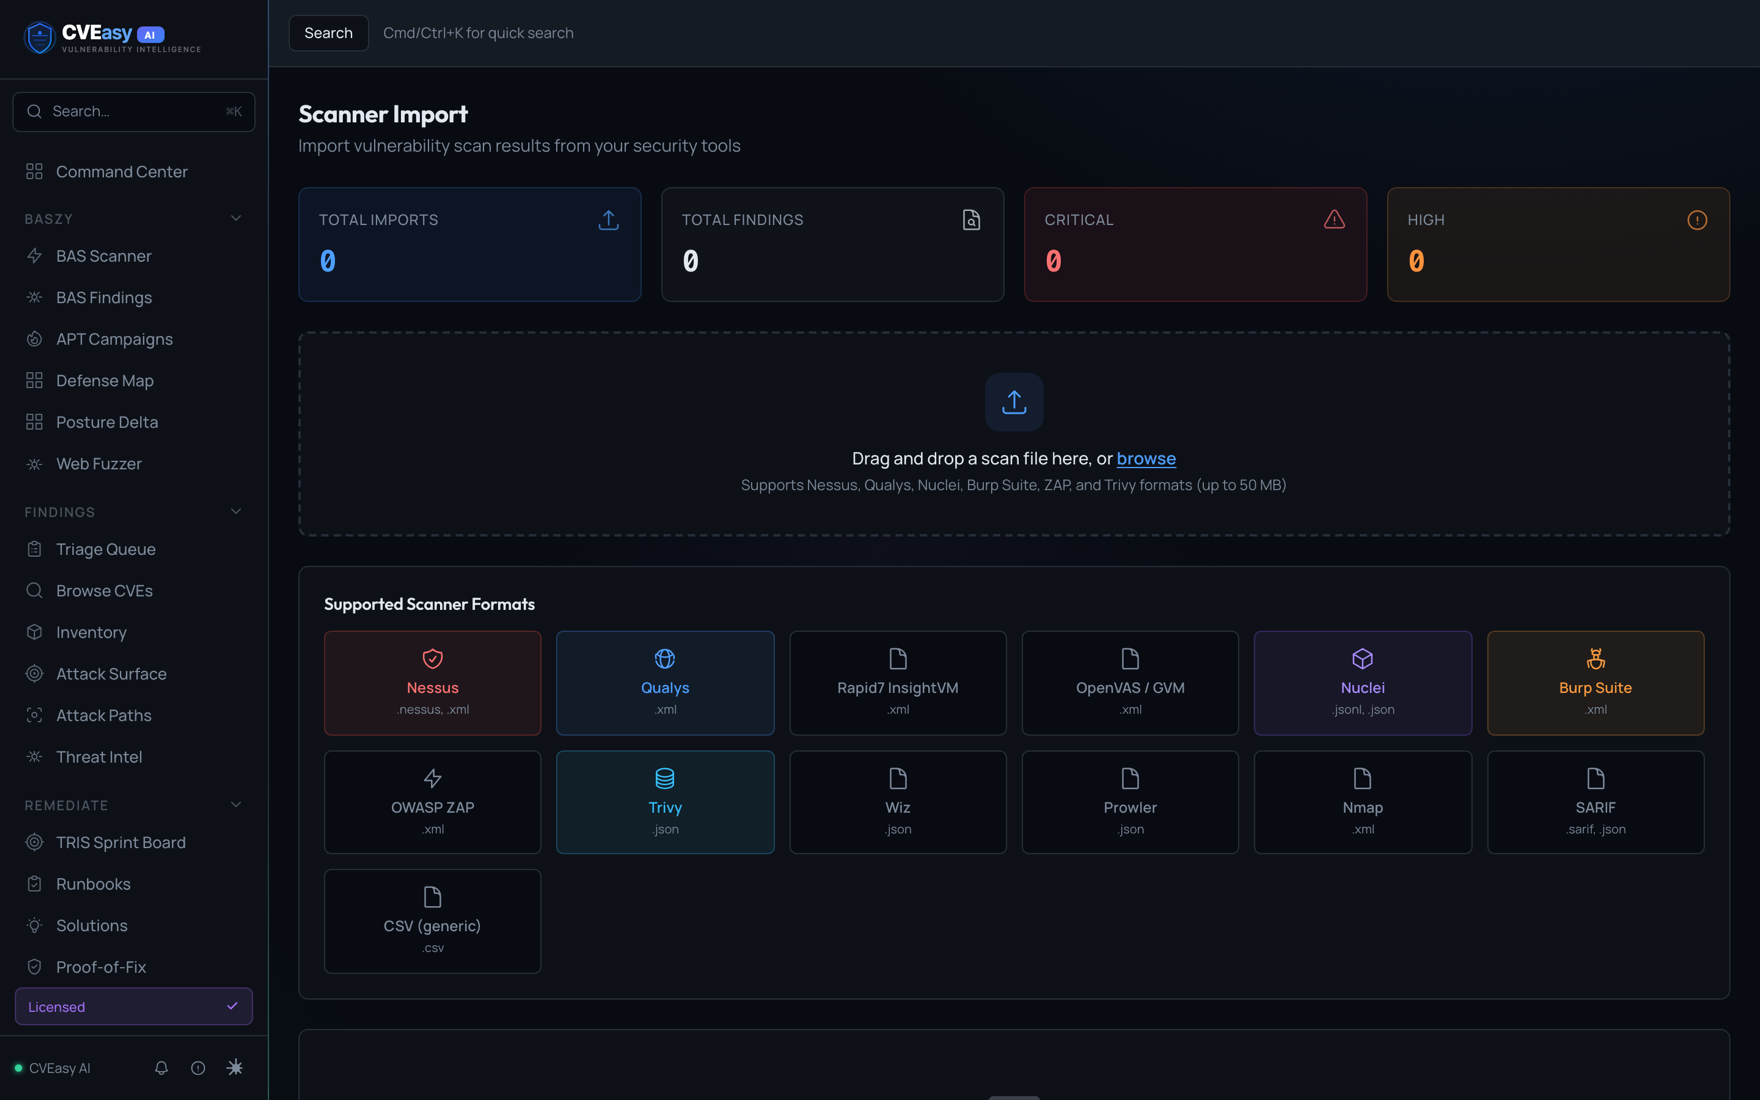
Scan Imports. Drop a file from Nessus, Qualys, Rapid7, OpenVAS, Nuclei, Burp Suite, OWASP ZAP, Trivy, Wiz, Prowler, Nmap, SARIF, or generic CSV. Format is auto-detected.
On import, CVEasy does five things automatically:
- Creates an asset for every host in the scan
- Links each finding to its CVE, with port and CVSS data
- Fetches any CVE not already in the local database from NVD
- Computes a TRIS score for each CVE on each asset
- Updates your attack surface and dashboards immediately
Path C. Discover assets with BASzy
No scanner yet? BASzy finds your assets for you. Open BAS Scanner under the BASzy group, enter an authorized network range such as 10.0.0.0/24, and start. BASzy enumerates live hosts, fingerprints services, and tests for exploitable conditions, no third-party scanner required.
5. Read your Command Center
The moment data lands, the Command Center becomes your home base. The top row is your posture at a glance: assets tracked, open findings, criticals and highs, your BAS validation score, and how many threat actors are targeting what you run. Below it, the Priority Queue already sorts your findings by real risk, not raw CVSS, so the first thing you see is the thing to do first.

Command Center. KPI deck up top, TRIS priority queue below, top remediations and sector threat actors on the right. This is the screen you open every morning.
6. Open a finding
Click any CVE, or open Browse CVEs under Findings to search the full catalog of 337,000+ CVEs by ID, product, or keyword. Filters for Critical, High, KEV, and TRIS band let you cut to what matters.
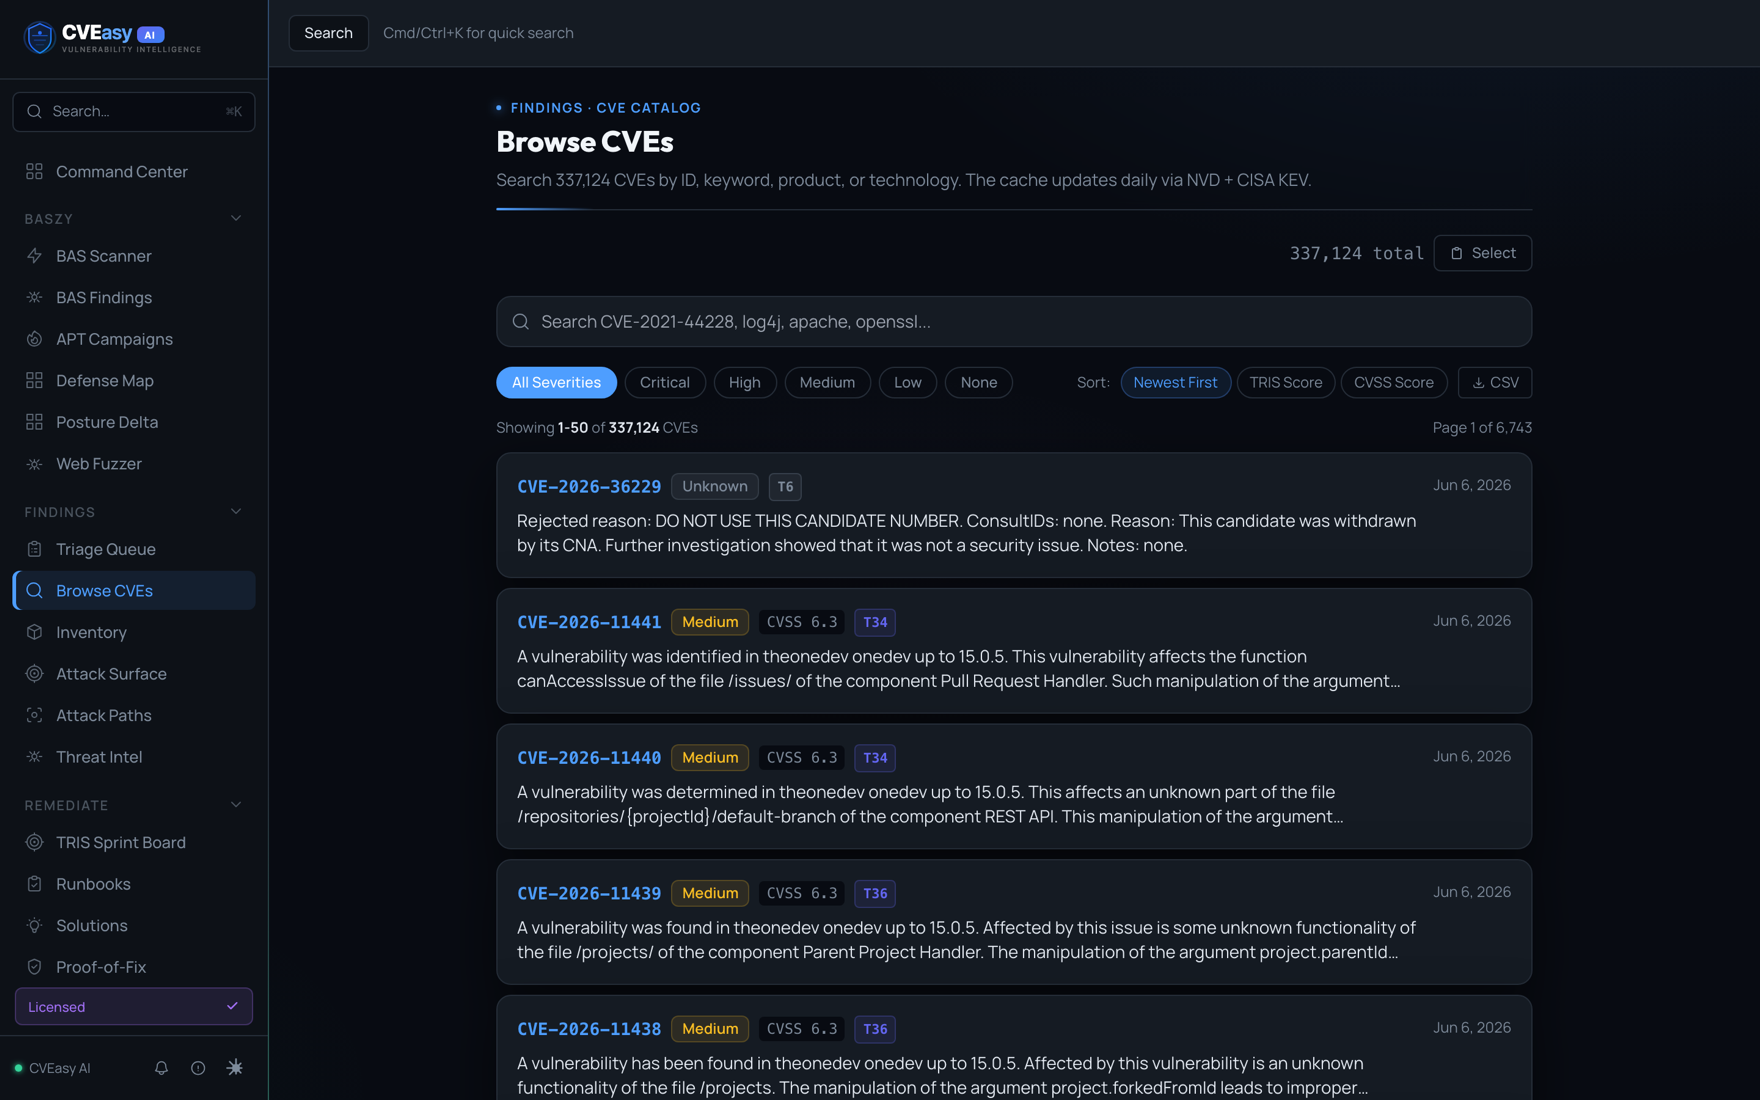
Browse CVEs. The full catalog, searchable and filterable, updated daily from NVD and CISA KEV.
The CVE detail page is where CVEasy separates signal from noise. Take Log4Shell below. CVSS says 10.0, but the page goes further: EPSS at the 100th percentile, an active CISA KEV listing with the federal remediation deadline, attacker pressure scoring, public exploit maturity, and the compliance frameworks this CVE puts at risk. The big TRIS ring on the left is the single number that folds all of it together.
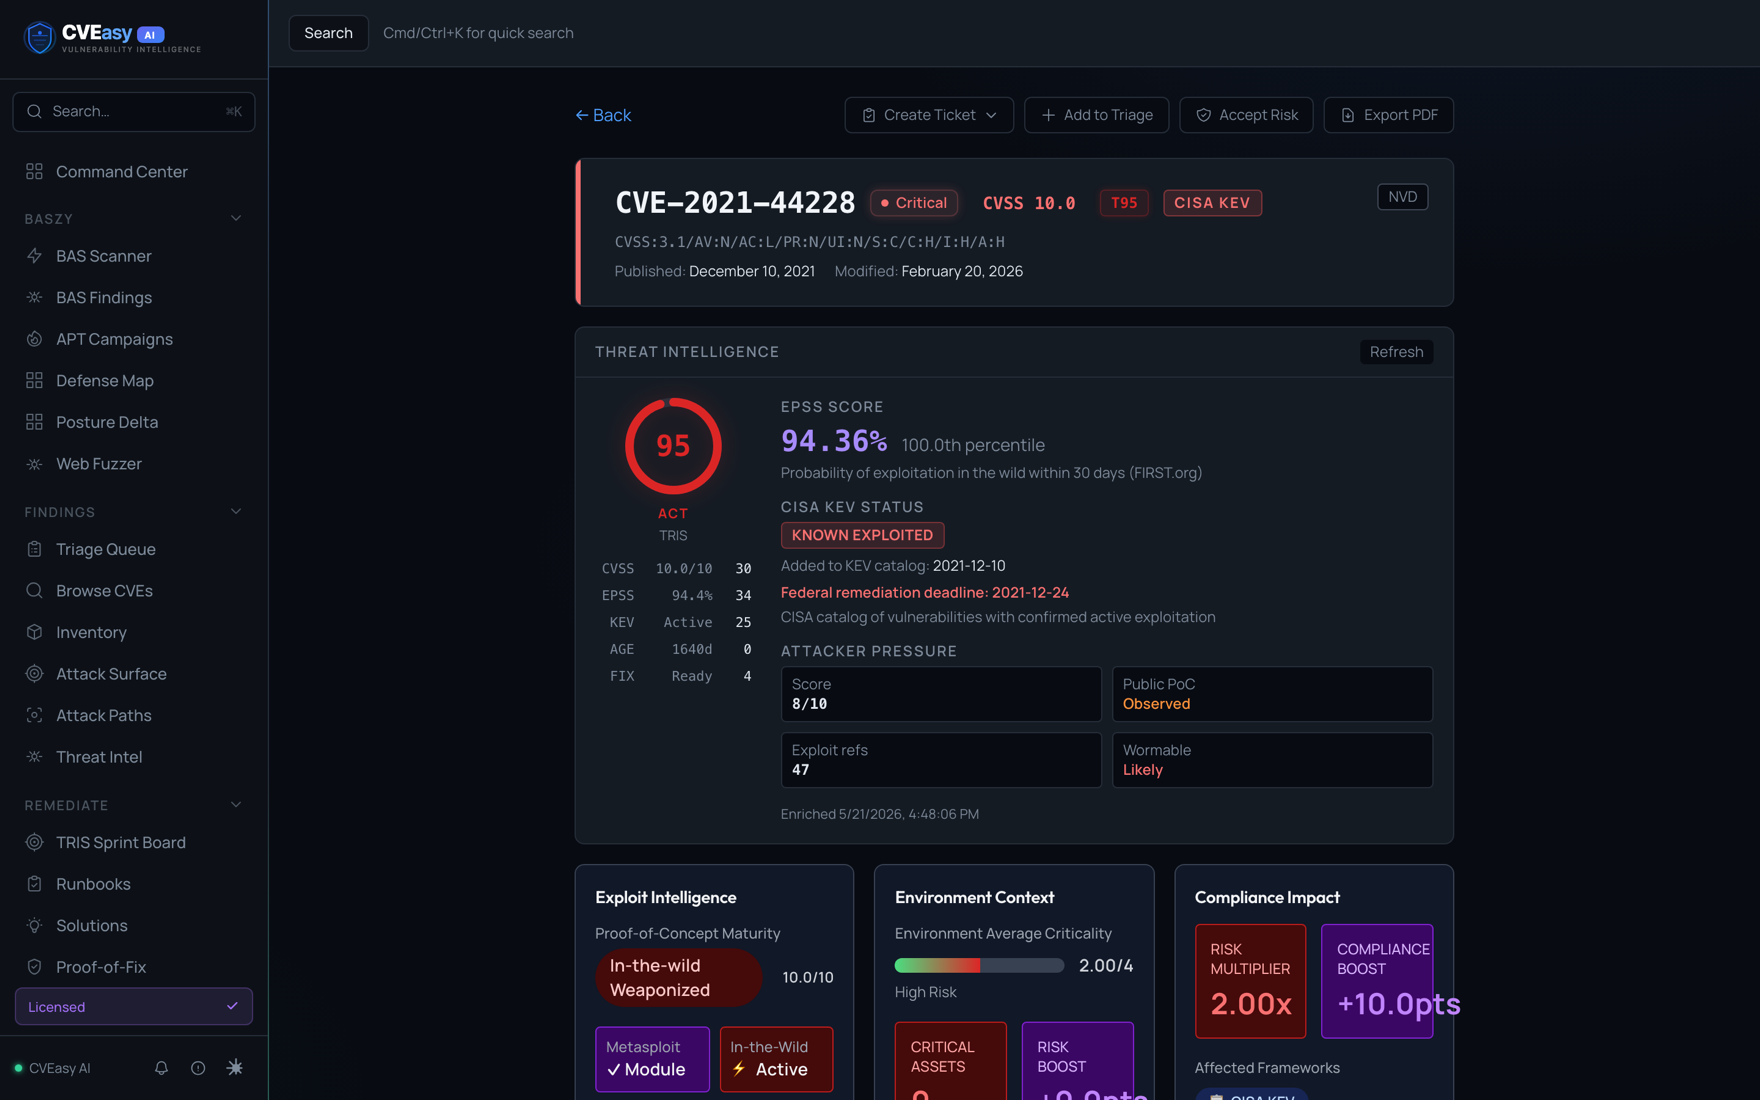
CVE detail. Threat intelligence, exploit maturity, environment context, and compliance impact on one page. The TRIS ring is the verdict.
7. Work the Triage Queue
Open Triage Queue under Findings. This is your kanban for vulnerabilities: every CVE moves through New, Triaged, Assigned, Mitigating, and Resolved. The counts across the top tell you the shape of your backlog at a glance, and overdue items are flagged so nothing quietly slips.
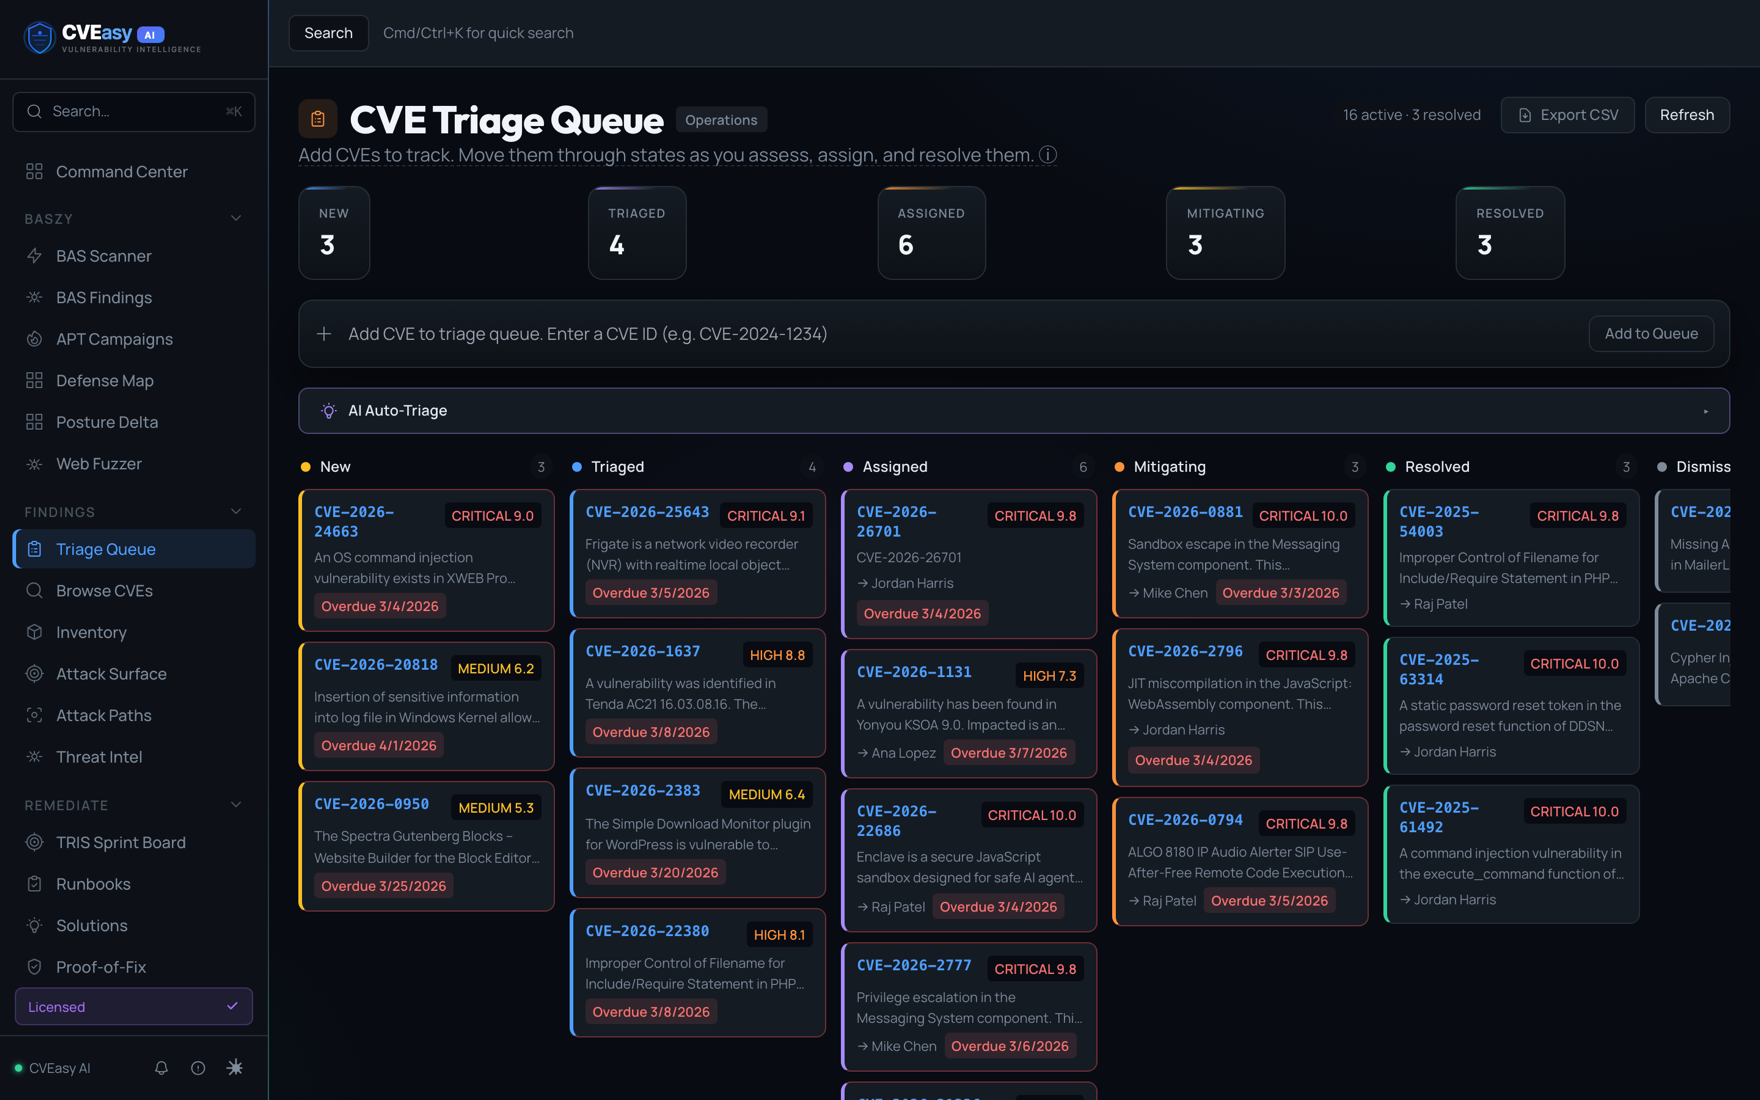
Triage Queue. Drag a CVE across columns as it moves from discovery to fixed. Auto-triage can suggest the next state for you.
8. Prioritize with the TRIS Sprint Board
Open TRIS Sprint Board under Remediate. This is where prioritization stops being a debate. Findings are sorted into action bands by their TRIS score, and each band carries a real timeframe:
- ACT Patch within 72 hours. Actively dangerous right now.
- ATTEND Patch within two weeks. High priority, schedule it this sprint.
- TRACK This quarter. Real, but not on fire.
- MONITOR Watch for change. Low risk today.

TRIS Sprint Board. Click any score chip for the full 12-layer breakdown of why a finding landed in its band.
Want the full asset picture while you plan? Inventory under Findings is the canonical registry of every host, auto-deduped across scans, BAS, and connectors, with the CVE, critical, and KEV counts per asset.
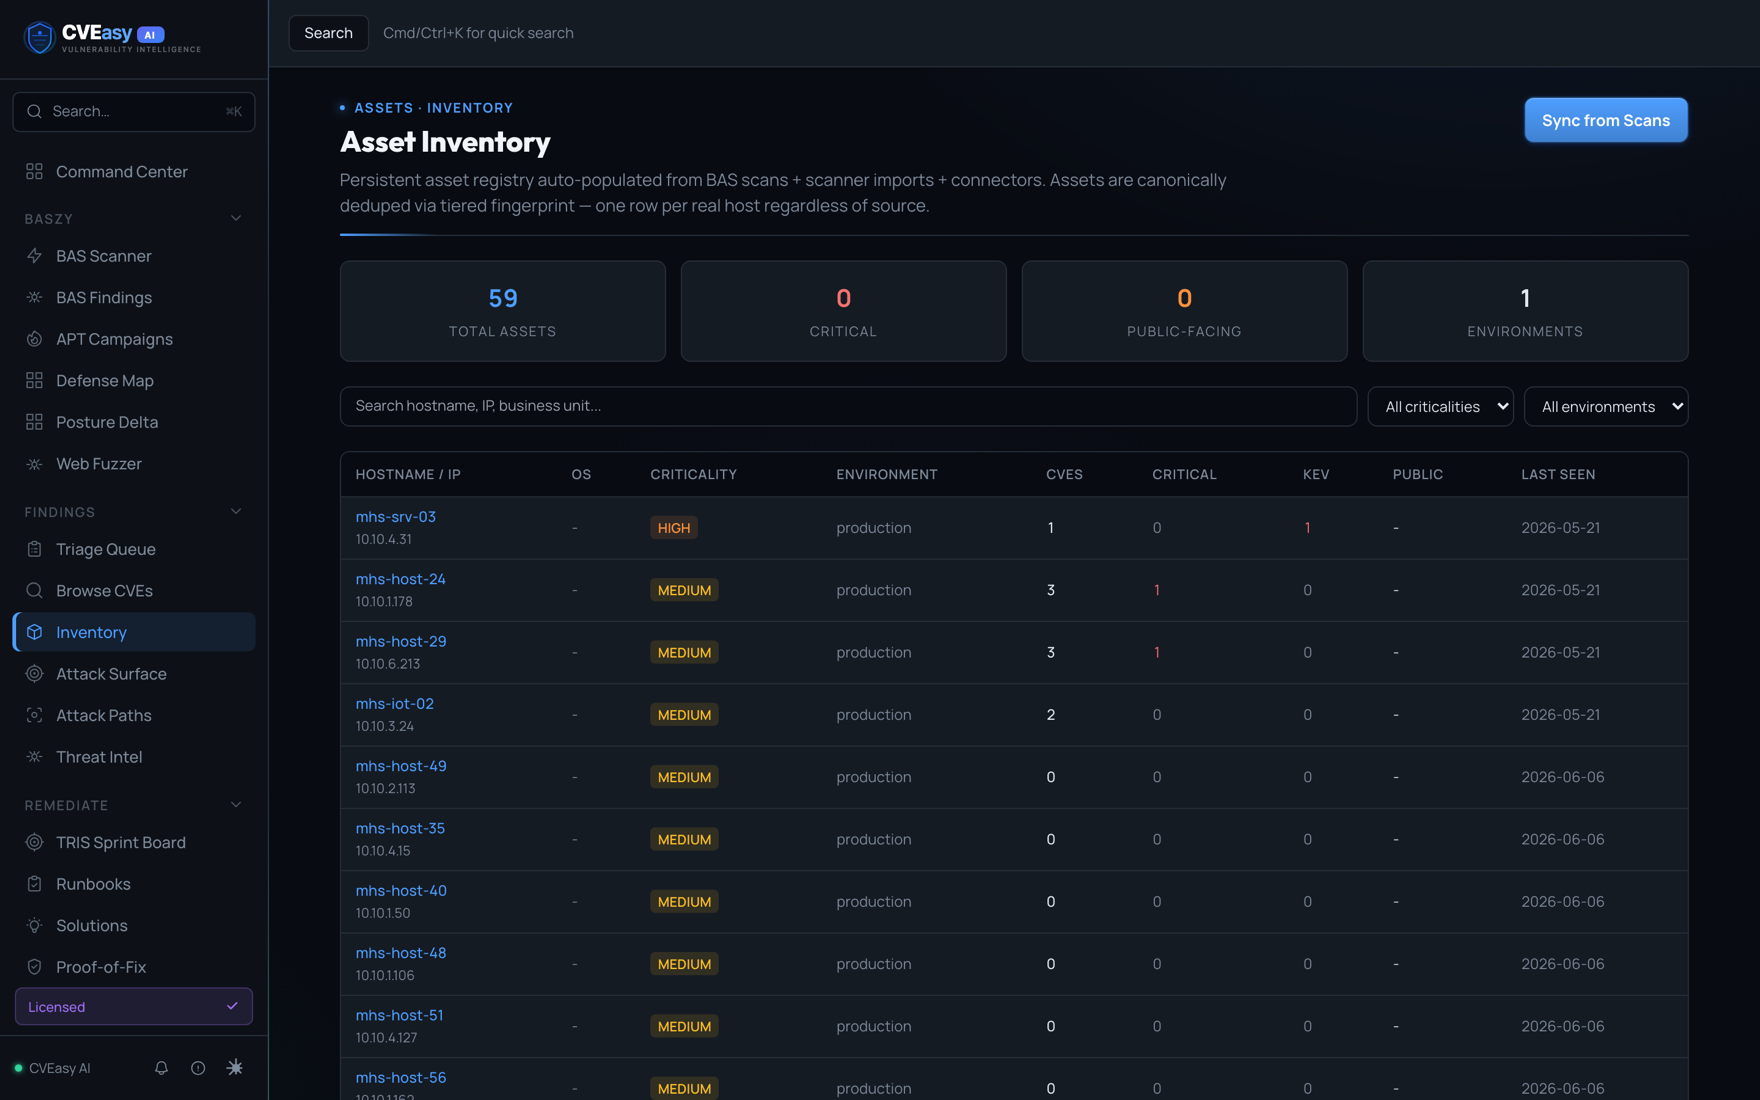
Asset Inventory. One row per real host, regardless of how many tools reported it.
9. Validate the finding with BASzy
This is the step that separates CVEasy from a scanner. A scanner tells you a CVE is present. BASzy tells you whether it is actually exploitable in your environment, by safely running the real attack technique against the target. Open BAS Scanner under the BASzy group, point it at an authorized target, and run an agentless simulation.

BAS Scanner. Agentless breach and attack simulation. No software on the targets, just an authorized range and a click.
When the run finishes, every finding carries a verdict. EXPLOITED means BASzy proved the attack worked and chained it to real impact, and those rise to the top of your TRIS scores. Findings it could not exploit drop down the list, so you stop spending sprints on vulnerabilities that were never reachable. Each result keeps its MITRE technique, target, and linked CVE.

BAS Findings. Proven results, not just scanner output. Critical and high here are what actually worked against your environment.
10. Generate a report
Open Reports under Operate. Pick the audience and CVEasy builds it: an Executive Summary for leadership, Technical Findings for engineering, a Remediation Roadmap grouped by priority band, plus Attack Simulation, Patch Compliance, and a Board Narrative. Every report opens as clean HTML you can share, and most export to PDF in one click.
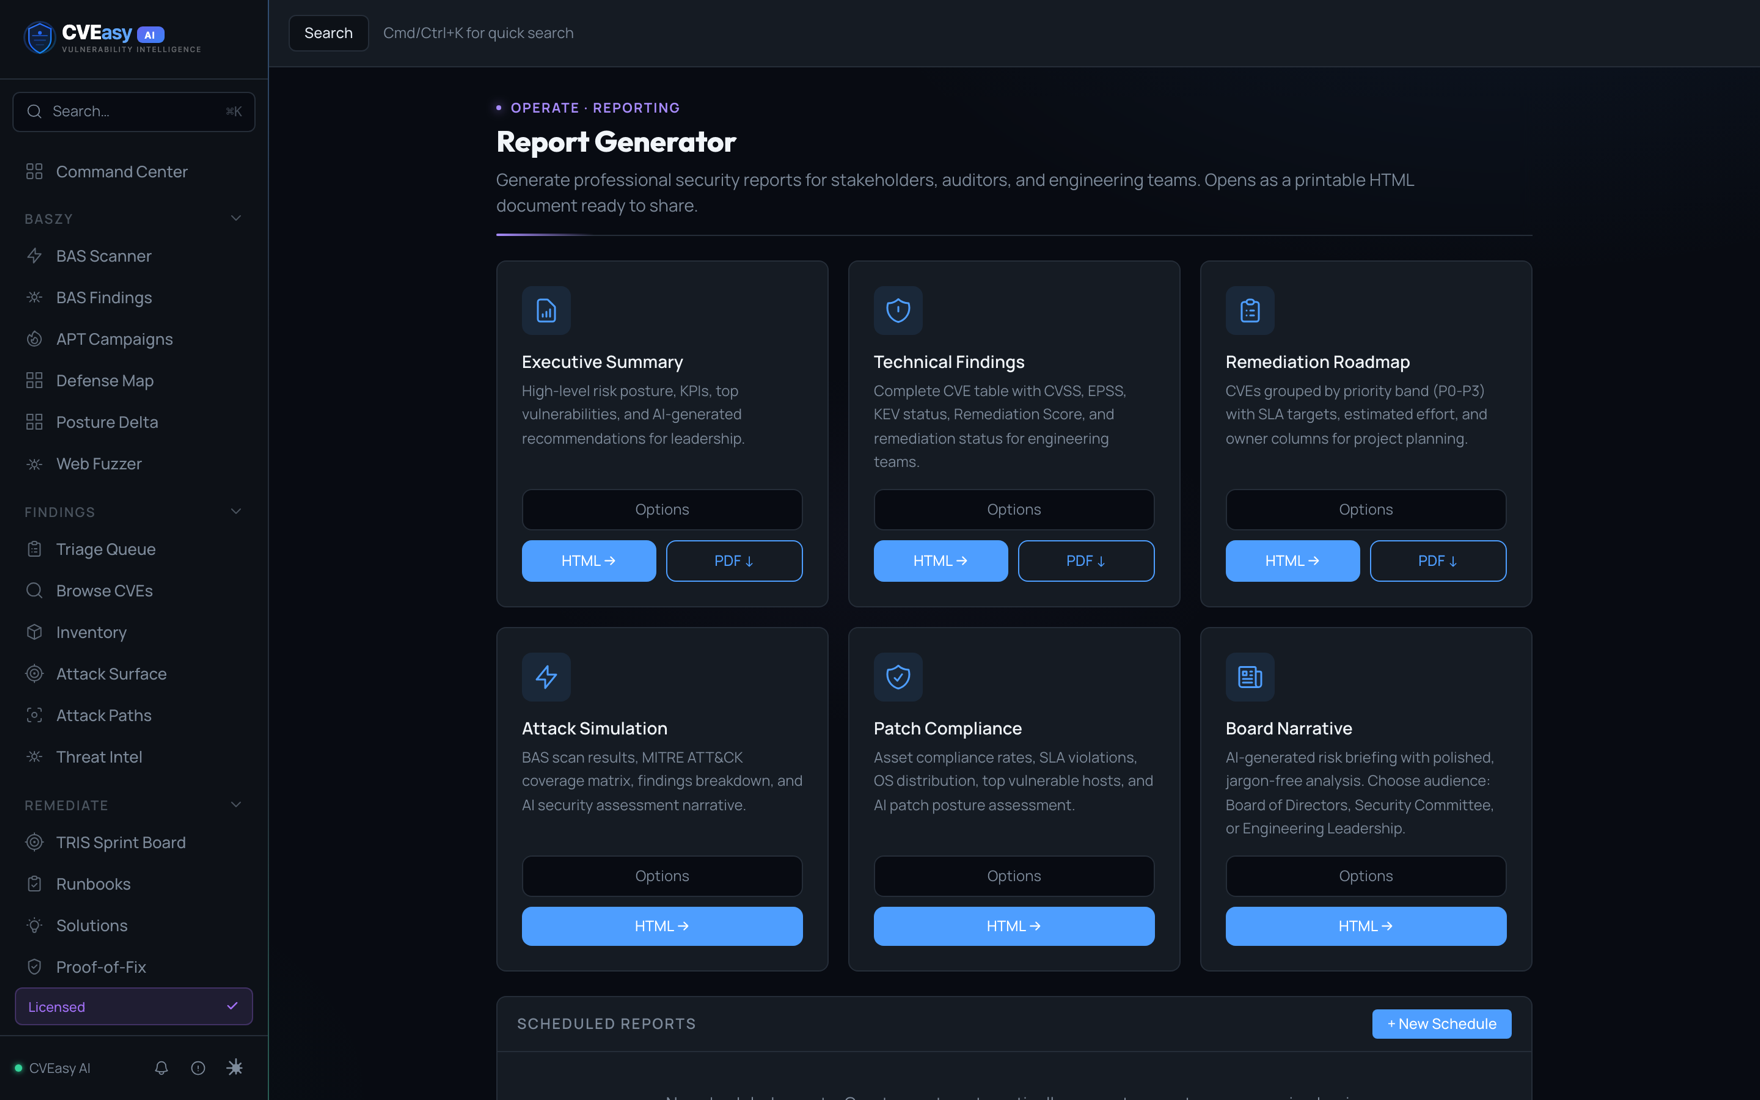
Report Generator. Pick the audience, get a tailored report. Executive, technical, compliance, and board formats are all one click.